Alarms Access and Configuration
The REST SDK supports alarm monitoring and raising, configurable using either ACE or REST API Interface .
Existing alarms and their state are available as data points, which can be read by an application using the REST API.
HCC2 core pre-defines a whole set of alarms that can be easily accessed by your app.
Using the HCC2 User interface (https://<<your HCC2 IP Address>>), you may go to Top Menu > Operate > Live Data and search for "Alarms". You'll see all available alarms states you may access from your application, as data points.
HCC2 Existing Alarms Listing (example)
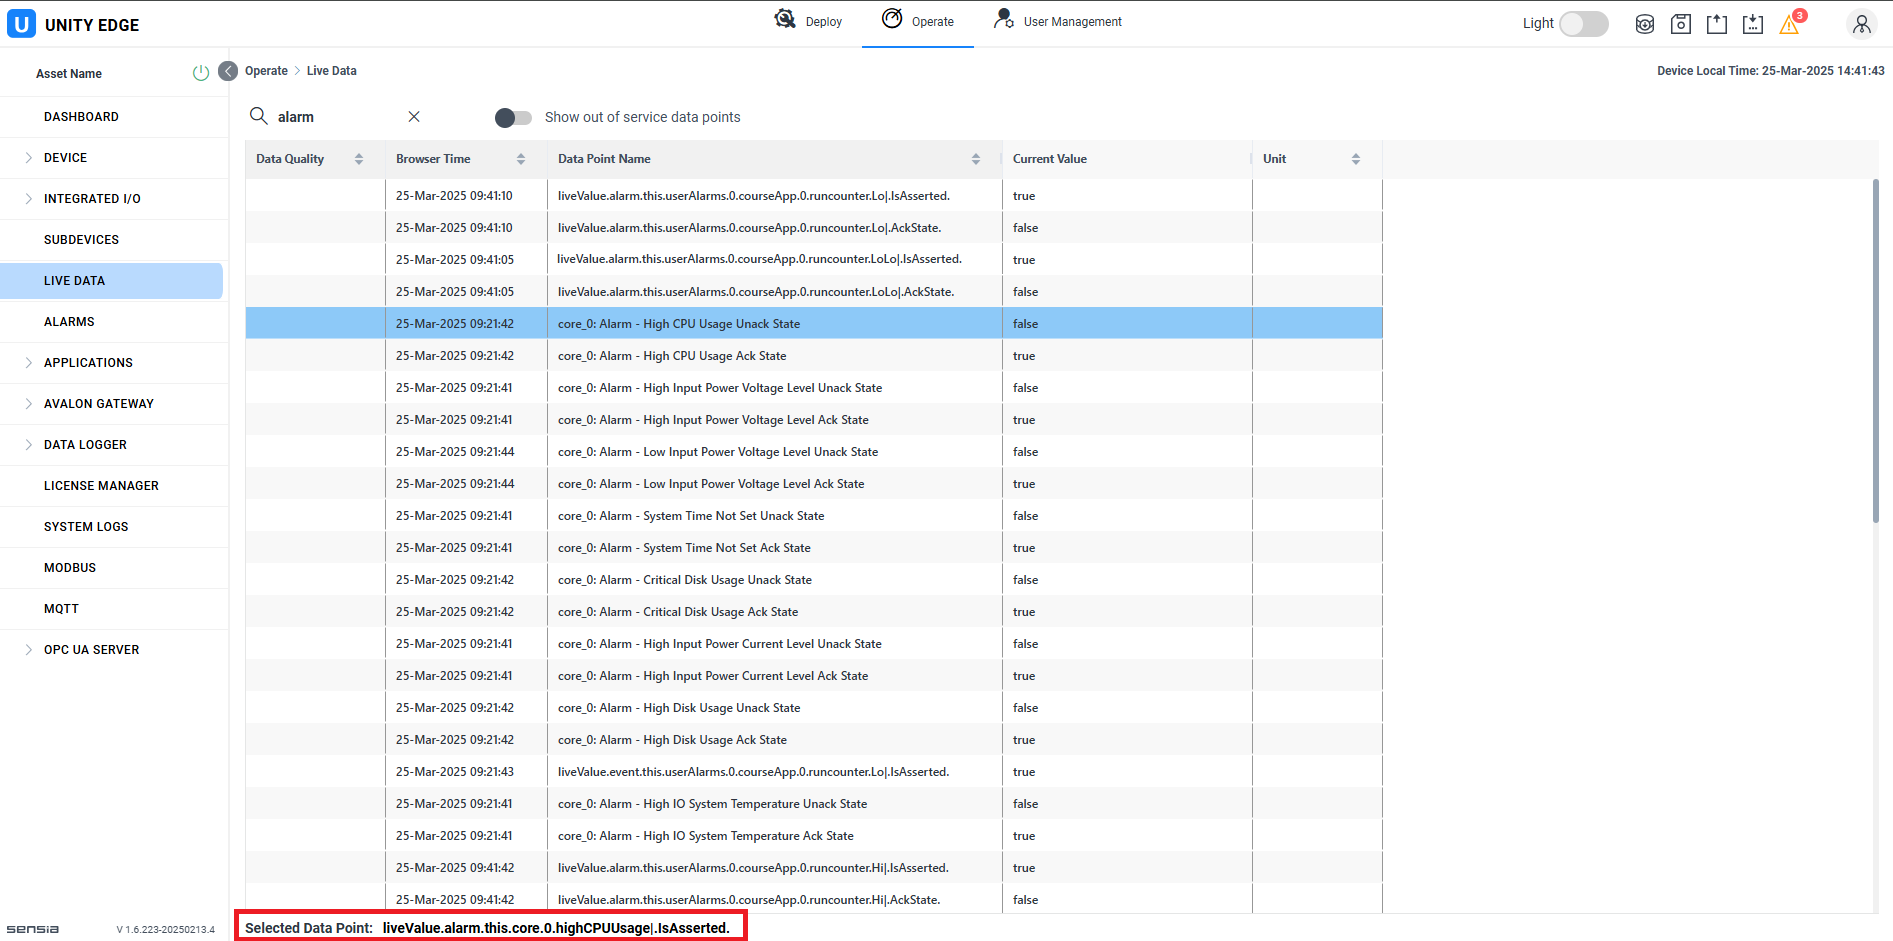
Those alarms data points may be read at any time (using REST API MessageRead or MessageReadAdvanced), or your application may subscribe to such data points, so it gets alarm changes in real time.
Your application can also create its own alarms. Your application may access alarms from other applications running on the same HCC2 as well.
Alarms Creation
Here's the workflow to create alarms:
- Set your application data points as "alarm-capable".
- Configure user alarms in HCC2.
- Deploy your newly configured application.
Set your Application Data Points as Alarm-capable
When configuring your data points, using ACE or the REST API Server directly. You must select which data points of your application to be able to generate alarms (alarm-capable).
Using ACE (just as example) you must declare your alarm-capable data points as Mapped Outputs, by going to "Data Point Flags" column and clicking "Mapped Output" on each datapoint that you want generate alarms from. Please see image below.
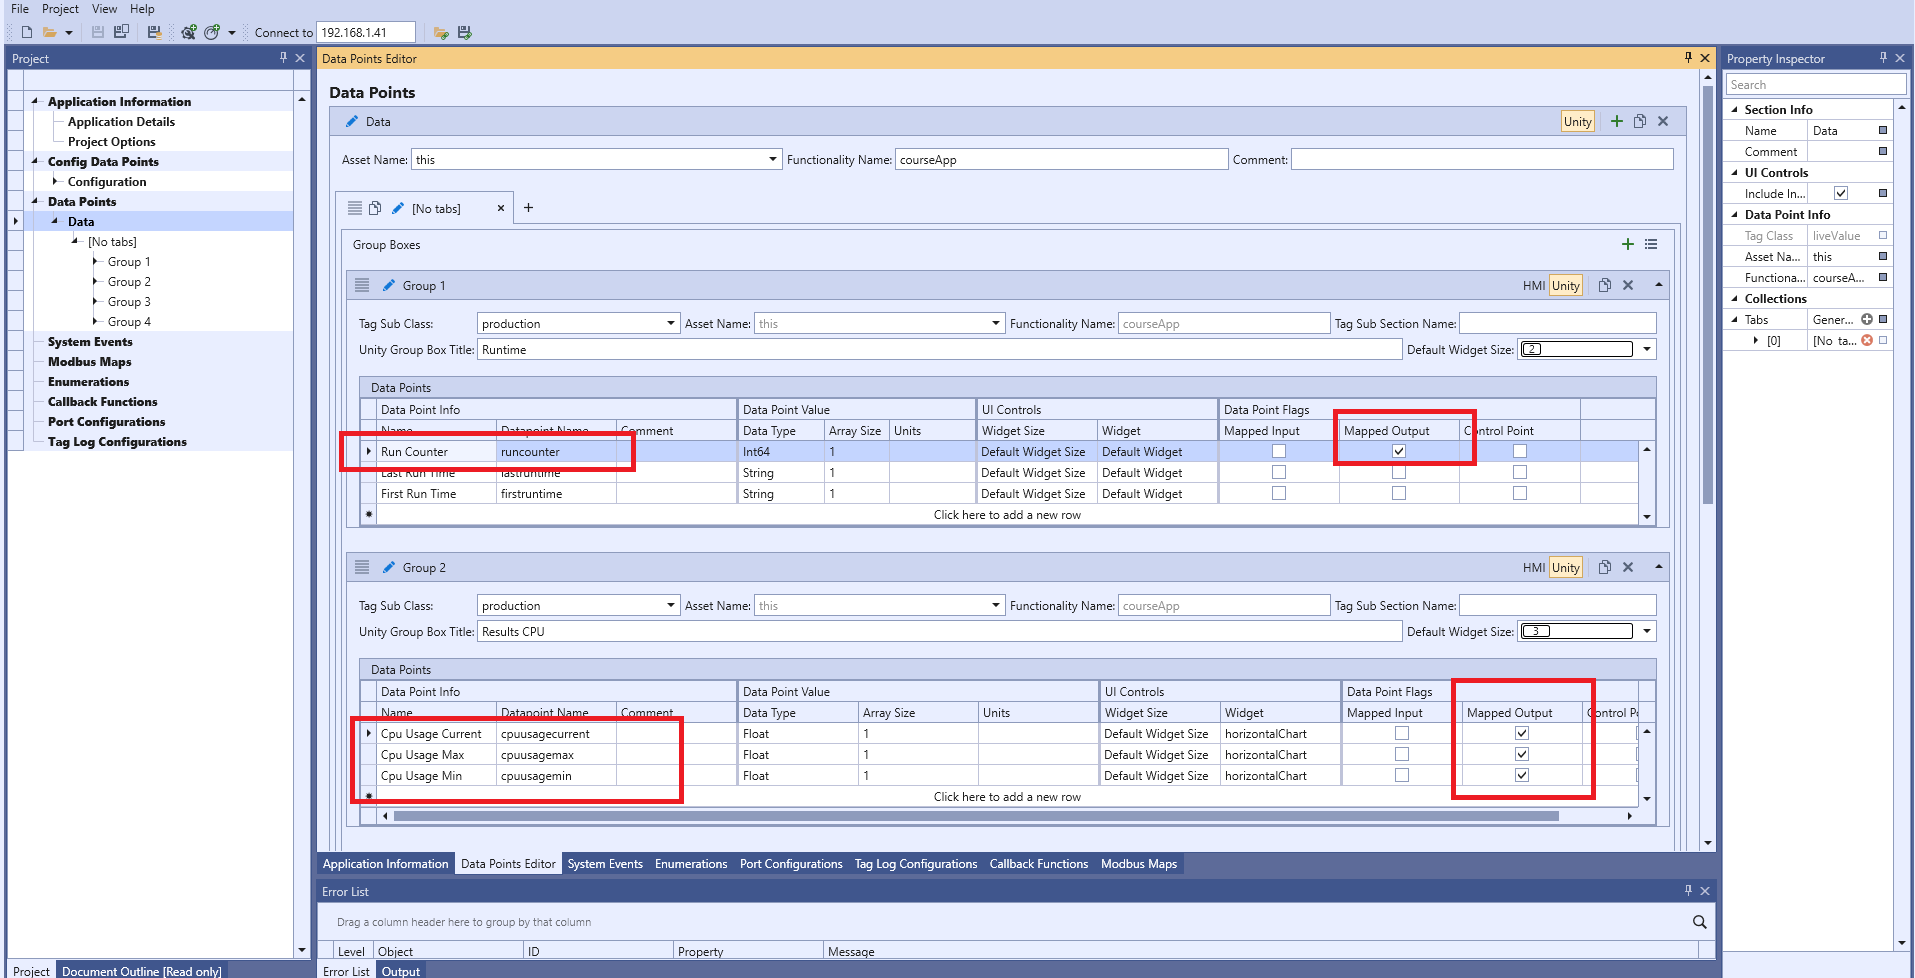
Note: you must save this new tarball (tar.gz) file and copy it into your application, as explained in this section.
Configure User Alarms in HCC2
- Open the HCC2 User Interface (Unity) (
https://<<your HCC2 IP Address>>). Remember that you must provide a valid HCC2 username and password. - From top menu, click Deploy.
- On the left navigation tree,click on USER ALARMS > User Alarm Configuration.
- Press the "Add New Alarm" button.
Your screen should show as presented below.
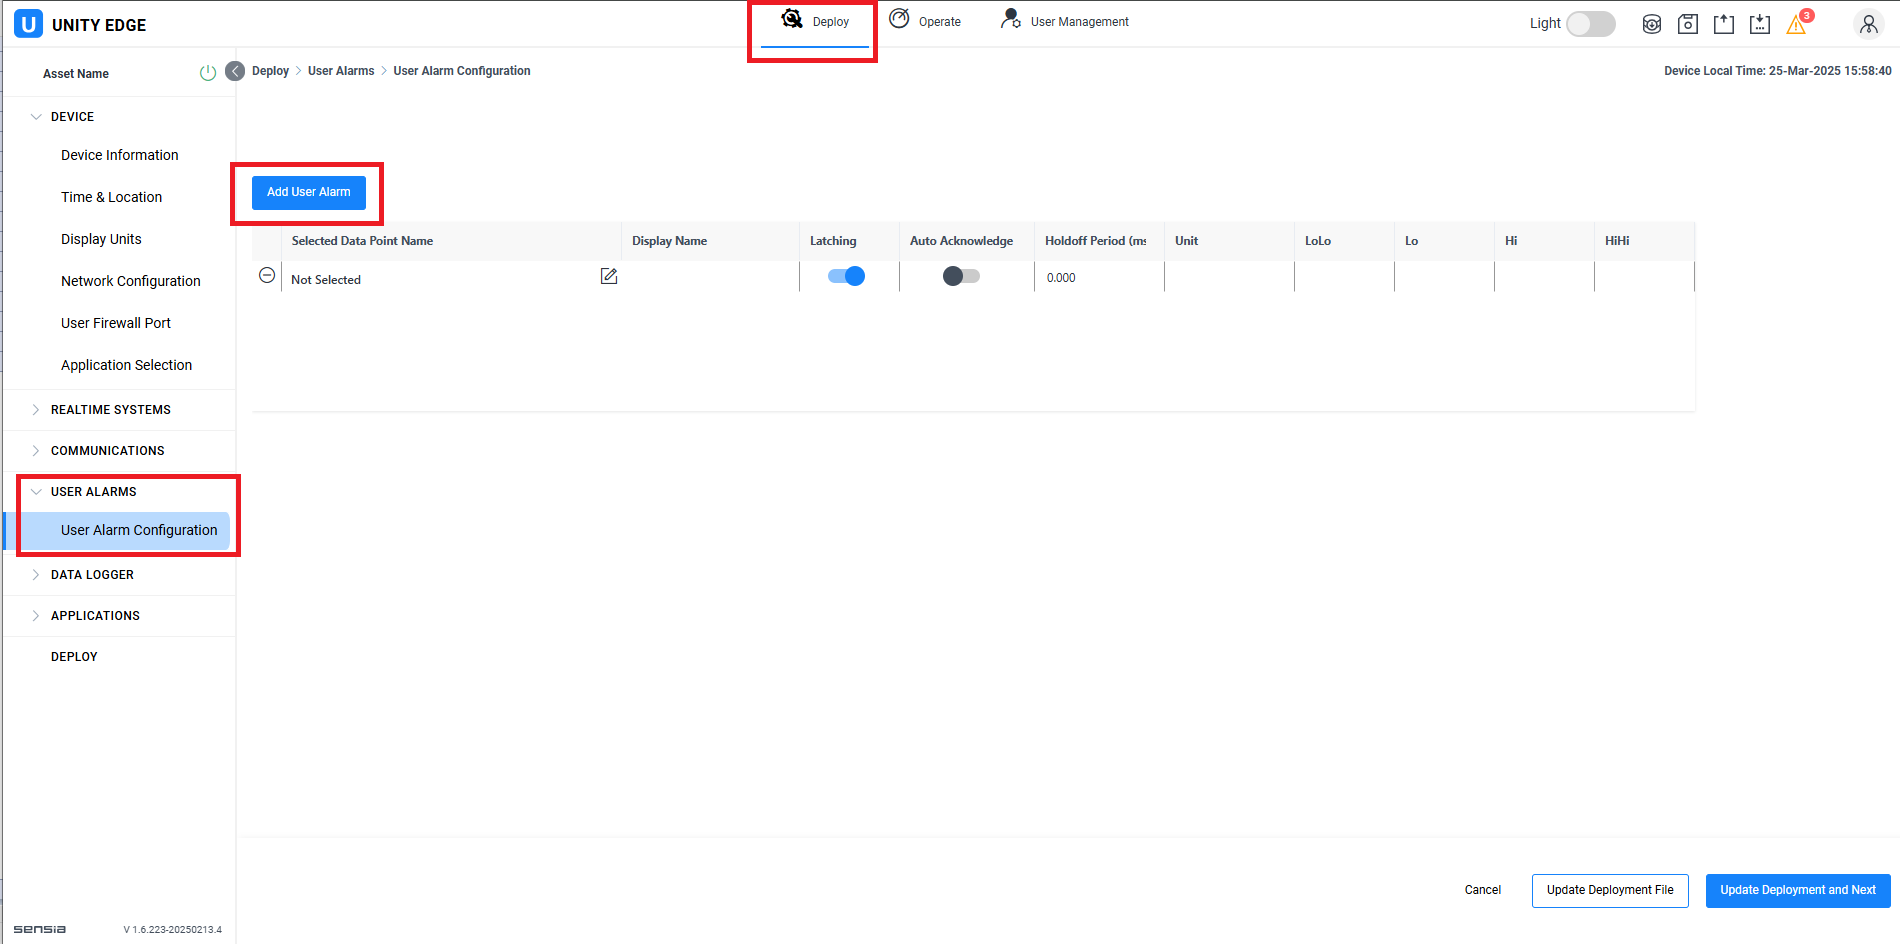
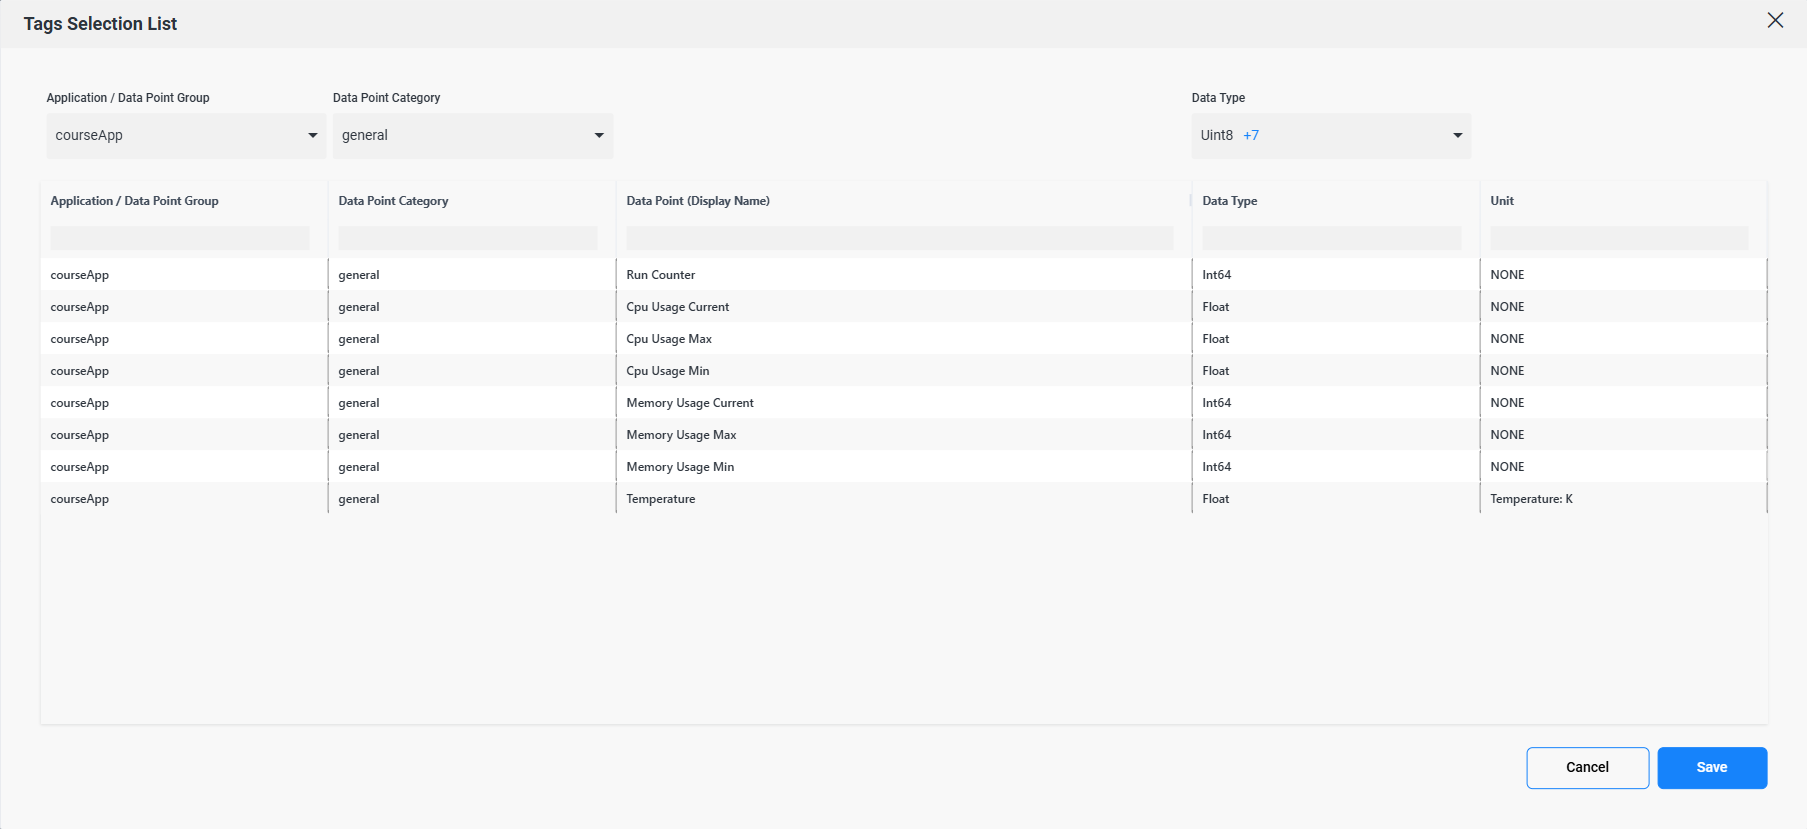
- Click on the "Edit" (pencil) button. A "Tags Selection List" window must pop up in your screen.
- Go to "Application / Datapoint Group selector, located on the top left side of the screen. Select your application, as it is displayed in on the selector list. See image below.
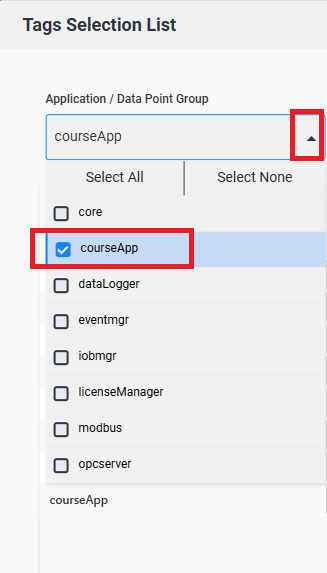
- A list of all alarm-capable data points for the selected application will be shown.
- Select the datapoint that you want to set as alarm-capable. The full topic name of the selected datapoint will be displayed at the bottom of the pop up window. Once Selected, click the Save button.
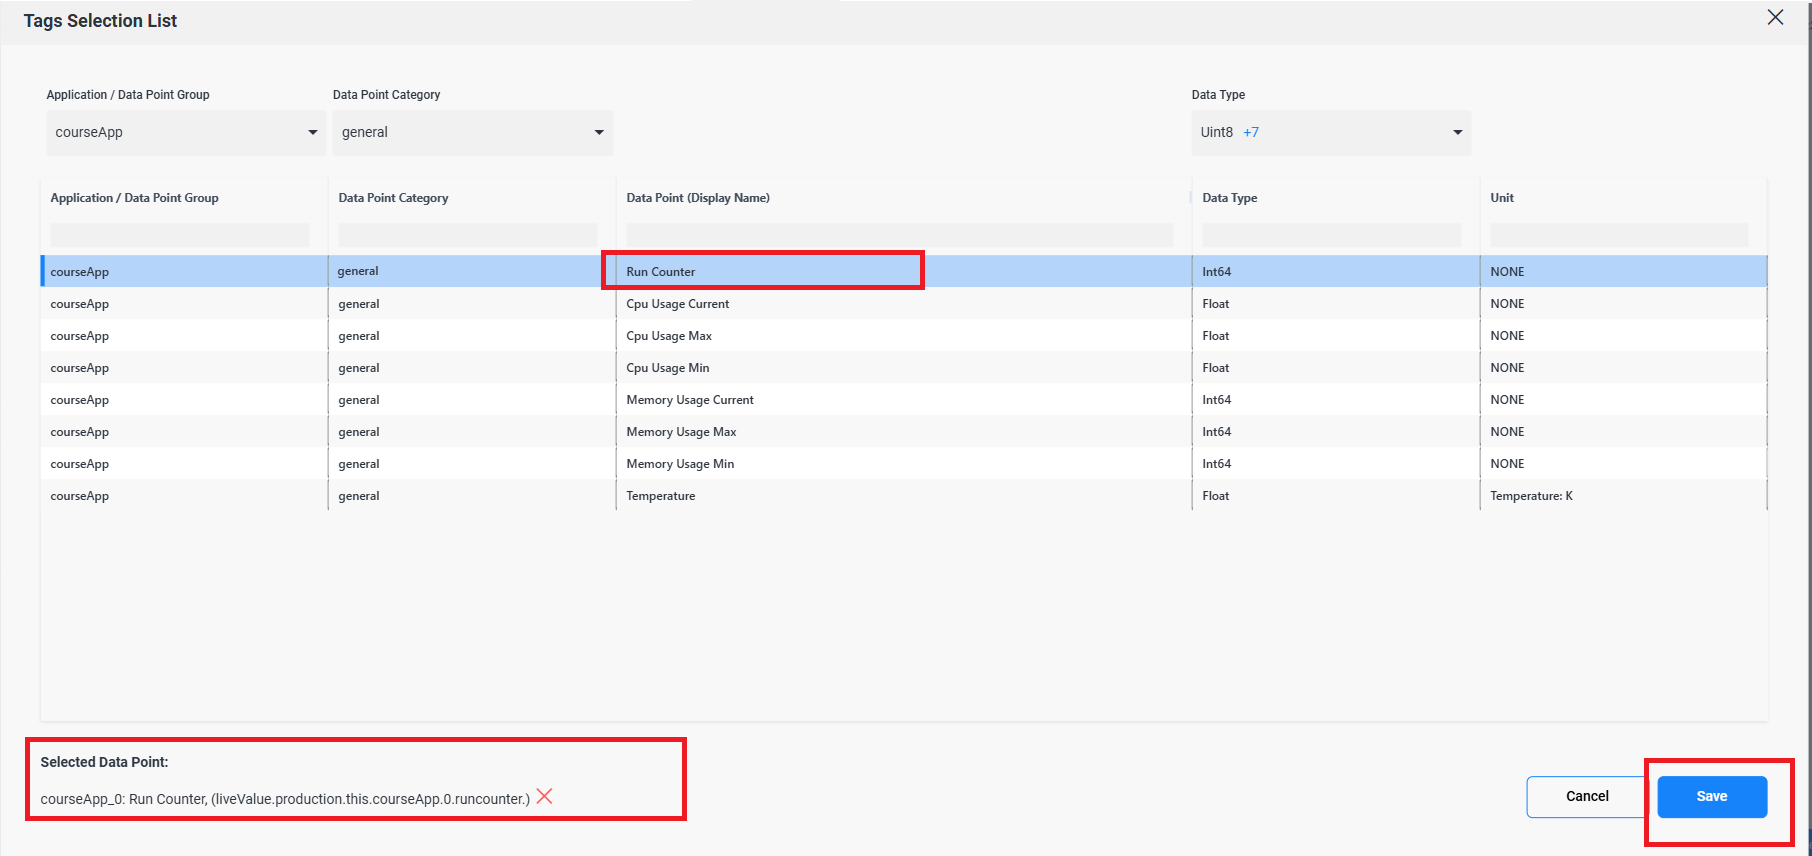
- Repeat this procedure for all the alarm-capable tags you want to select.
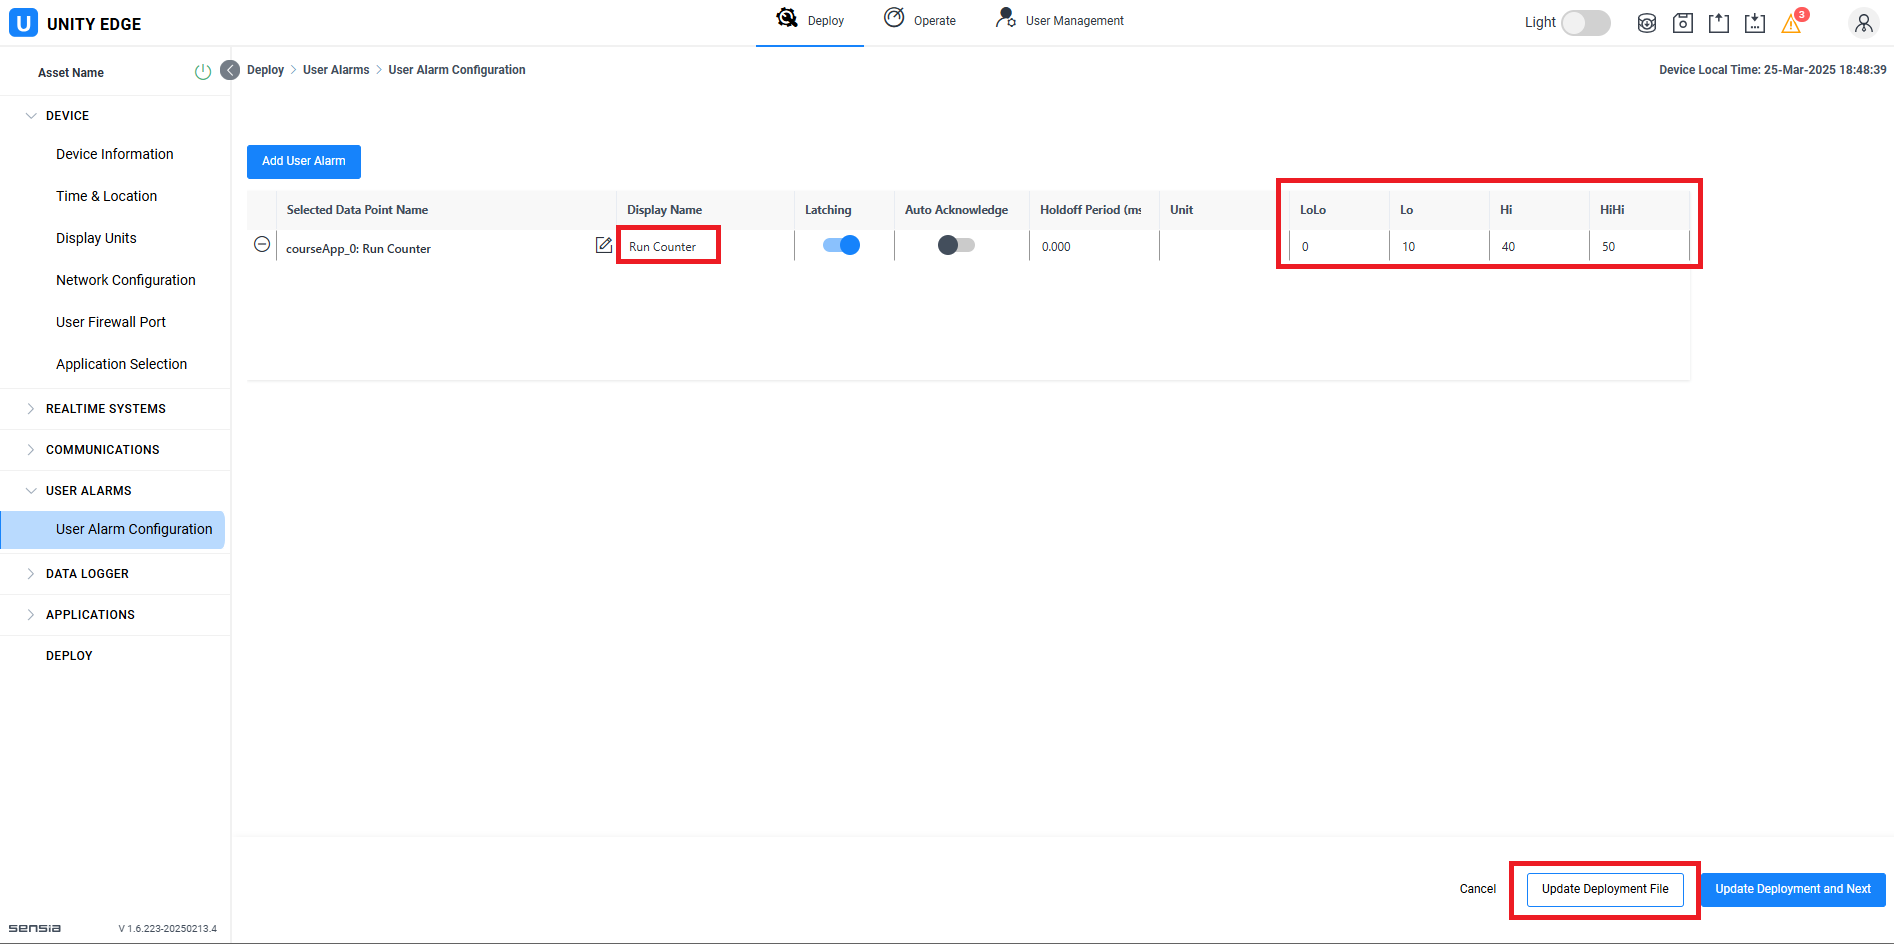
Once you have selected your alarm-capable point(s), you need to configure the conditions which this datapoint will trigger an alarm.
- Assign a "Display Name" to your alarm. It can contain spaces.
- Hold off Period is optional, not currently used. Leave it at zero.
- You need to configure the value for up to 4 alarm levels. HCC2 will compare current realtime value of selected datapoint against each level. If alarm level is empty, such level will not generate alarms.
Four levels of alarming are provided:
- LoLo. if configured, if current value <= LoLo limit, a LoLo alarm will be generated.
- Lo. if configured, if current value <= Lo limit, a Lo alarm will be generated.
- Hi. if configured, if current value => High limit, a Hi alarm will be generated.
- HiHi. if configured, if current value => HiHi limit, a HiHi alarm will be generated.
Once configured all alarms, press the "Update Deployment File" button. Please review the image below.
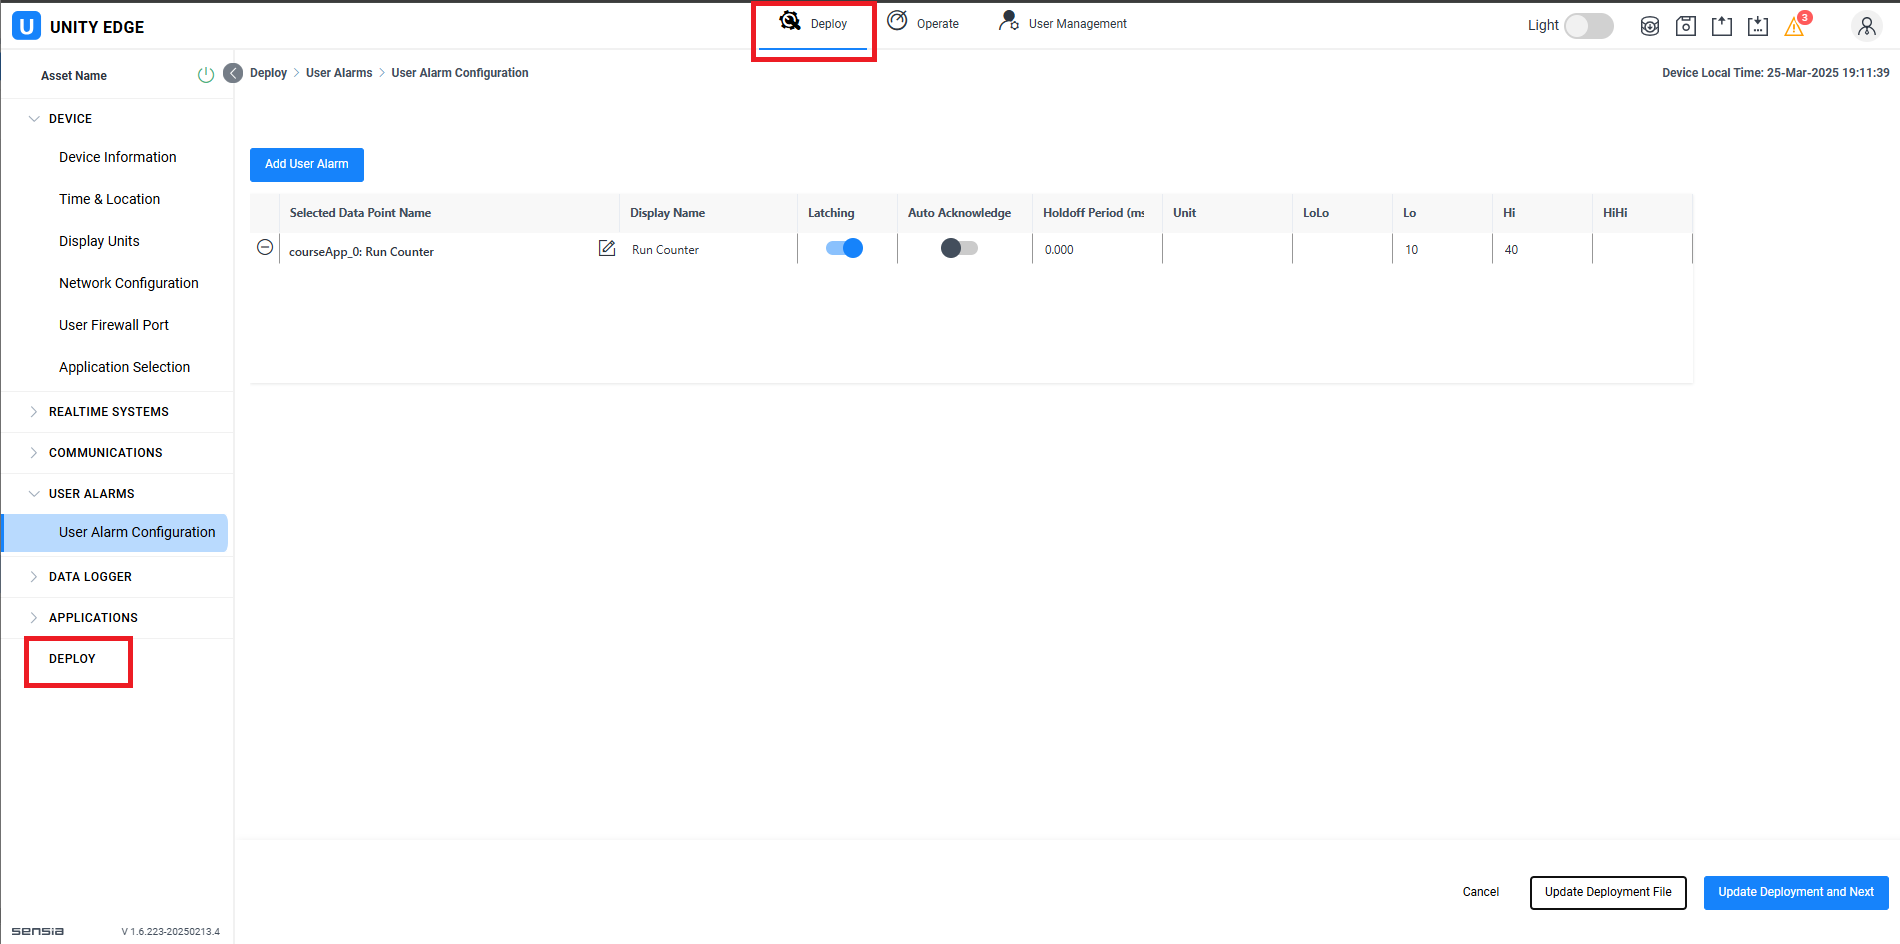
Finally, you must deploy your new configuration to HCC2. Go to Top Menu > Deploy. Then select "DEPLOY" from the left navigation menu, as highlighted in the image below.
Note: You may find more information on how to use and configure a HCC2 file by downloading the QRATE HCC2 Hyperconverged Edge Controller Software Manual. The link is available here.