Data Points Configuration using ACE
Application Configuration Editor
The Application Configuration Editor (ACE) is a Windows application that helps developers create the data structure required by an application, as well as UI layout, and advanced areas, such as events and optional automated C# code generation.
ACE offers you a similar way to create data points as Swagger interface but with more advanced functionality and bulk entry control.
Tip
When adding data points you are also designing the basic layout of the UI of your application, as it will appear within the HCC2 Unity Edge interface.
The output of ACE is a configuration file (called "tarball" or "tar.gz") that is used to register your application in an HCC2 on startup. This file can be published from ACE directly to the HCC2 to offer a preview of how the user will interact with the UI pages created for your application.
A detailed procedure on how to use ACE is outside the scope of this document. See the HCC2 ACE user manual. See the external references for more information.
To obtain an installation file for ACE, please contact Sensia.
Data Point Creation using ACE
Run the AppConfigEditor. It's main screen should display.
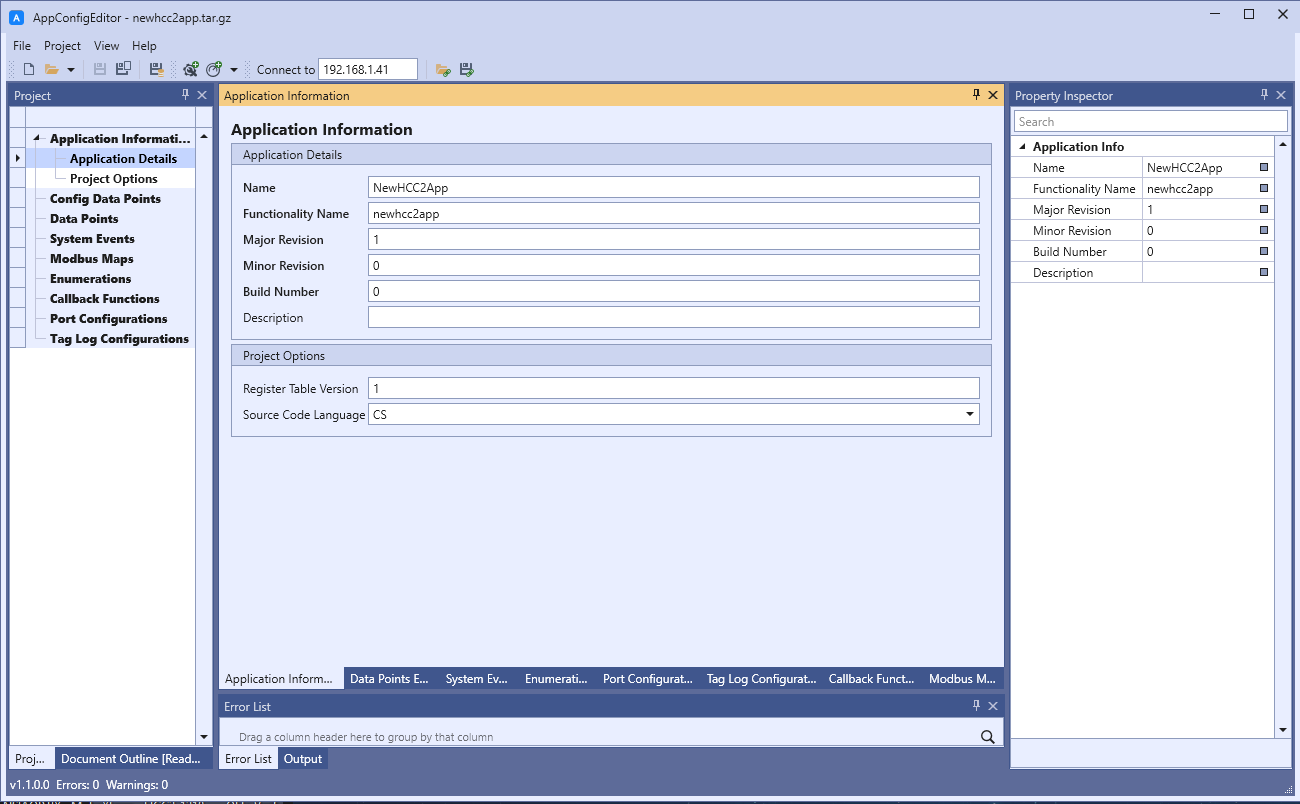
The basic workflow for creating data points using ACE is shown below. Please mind the numbers on the drawing.
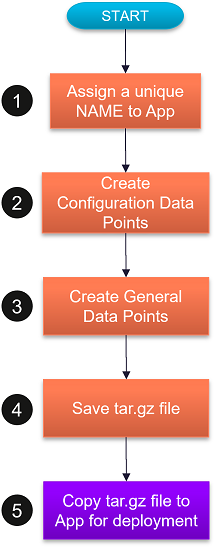
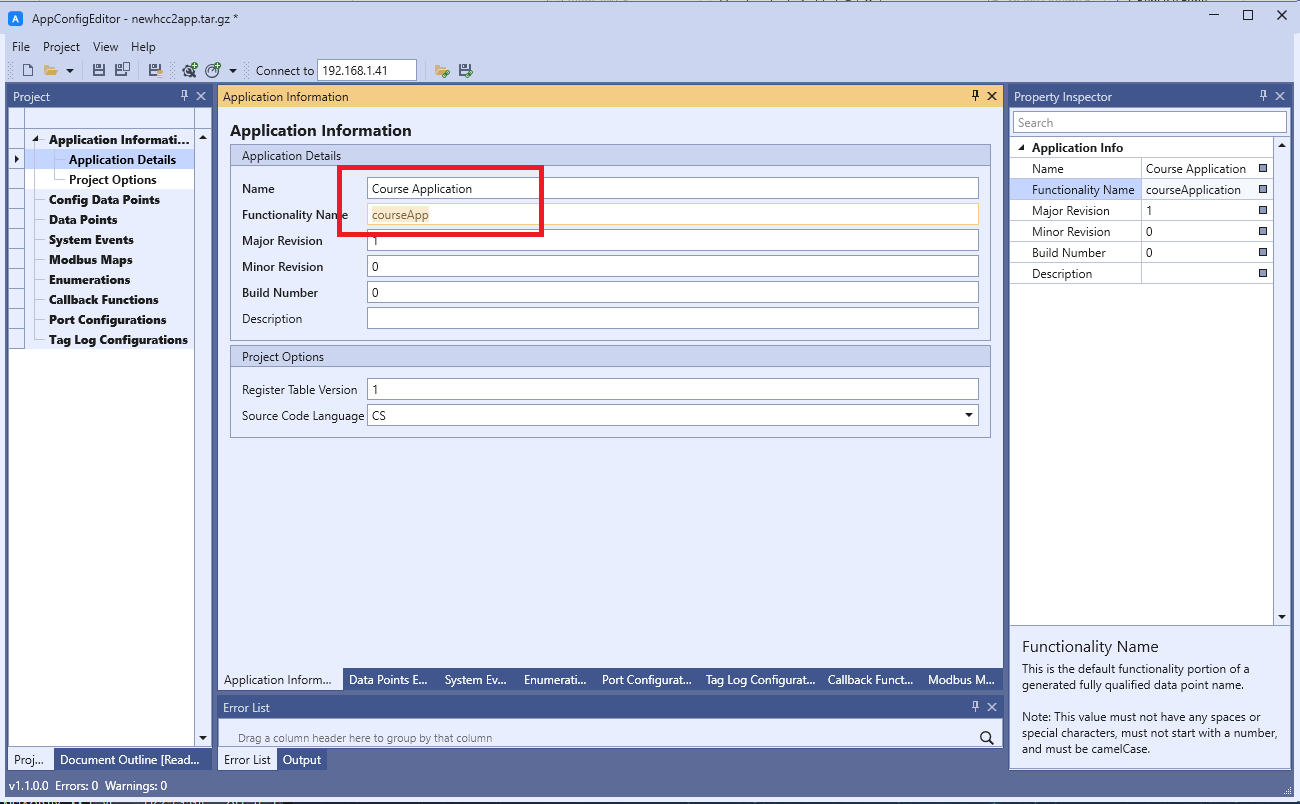
- Assign a unique name for your application. It must be written in camel case. Example: courseApp.
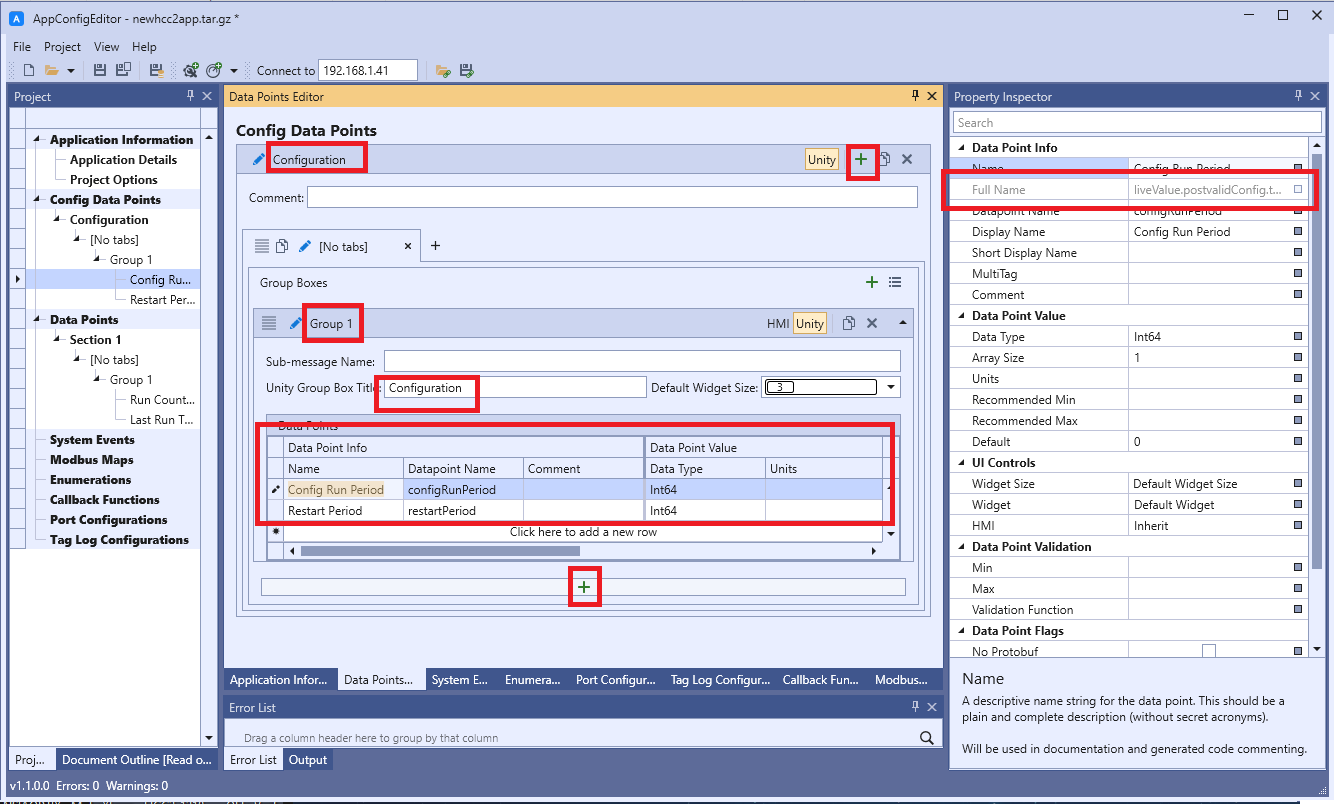
 2. Create configuration data points.
- Press "+" (Top Right).
- (Optional) Add a name to the configuration data points section.
- (Optional) Add a title to the configuration data points group.
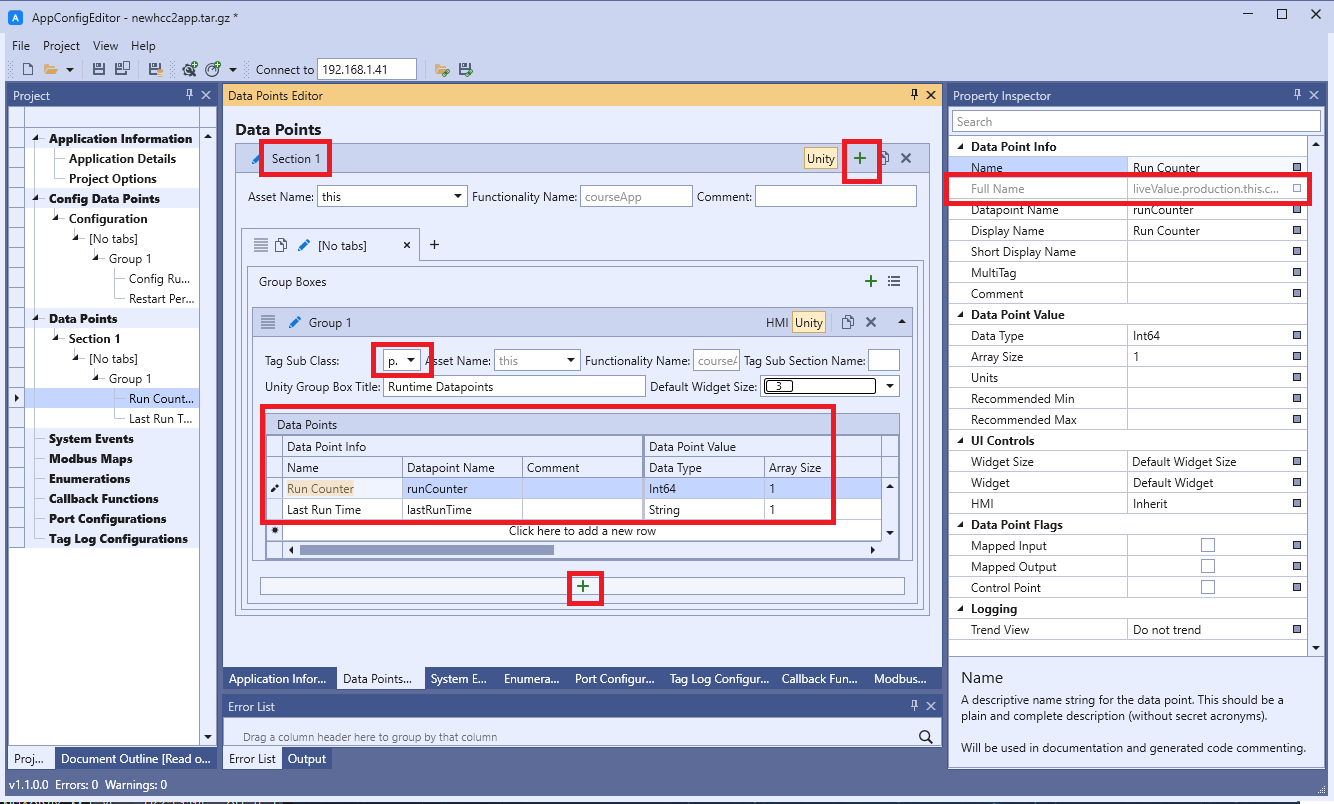
- To create a configuration data point group, press "+" (located near the middle of the screen).
- Within the group, each row defines a general data point. You may assign a name (shown in Unity Edge) and the data point name. Camel case is recommended.
- ACE automatically assigns a topic fqn (Fully Qualified Name) string to each data point that you create (see top right, at the Property Inspector window).
 3. Create general data points.
- Press "+" (Top Right).
- (Optional) Add a name to the general data points section.
- (Optional) Add a title to the general data points group.
- To create a general data point group, press "+" (located about the middle of the screen).
- You must select a Tag Sub Class. By default, select "production".
- Once within the group, each row defines a general data point. You may assign a name (shown in Unity Edge) and the data point name. Camel case is recommended.
- ACE automatically assigns a topic fqn string to each data point that you create (see top right, at the Property Inspector window).
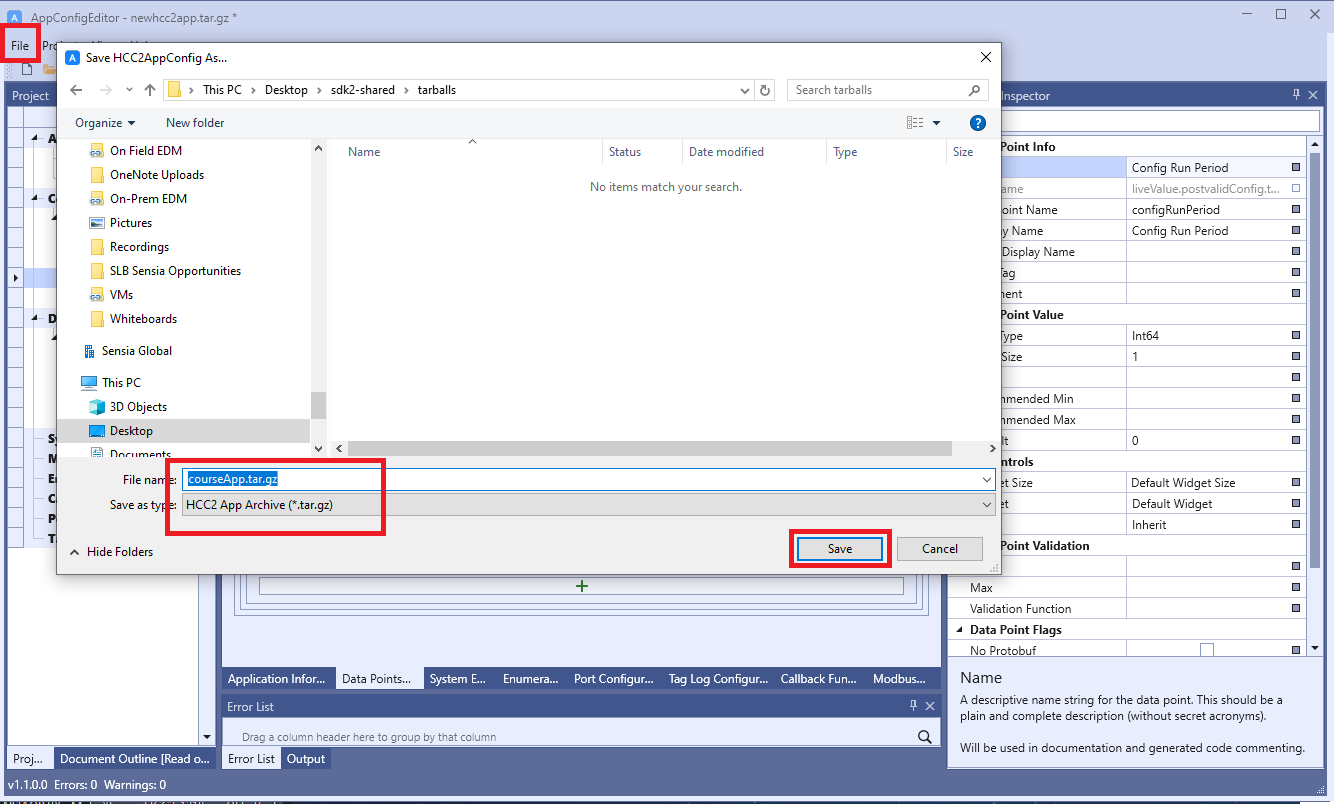
 4. Save tarball (.tar.gz) file.
- Go to top menu: File > Save As...
- Set a name for this tar.gz file. Sensia recommends using the same name as your app, in camel case.
- Press Save.
 5. Copy the tarball (.tar.gz) file.
- Save the file in your development environment.
- This file is essential input for registering your application in HCC2.